Welcome, Pioneers! Have you ever wanted to add a personal touch to your favourite jacket, vest, or backpack? Perhaps you own a garment that’s been sitting around with a few rips and you're not sure how you can revive it? Fear not! We're going to show you how to sew on your patches, add some serious style to your wardrobe and even breathe life into your old favourites.
&SONS / garment aftercare / Style Guide
March 24
Patch It Up: The Ultimate Guide to Attaching Patches to Your Garments
With a few basic materials and some simple steps, you'll be able to attach your patches like a pro. And to make things even easier, we've included a video tutorial so you can follow along step by step. Whether you're a seasoned sewer or a complete novice, by the end of this blog, you'll have personalised your clothing and added a unique touch that's all your own.
Embroidered patches have a rich history, dating back thousands of years to the ancient cultures of the Mediterranean, China, India, and South America. Today, they are still used by government organisations and sports teams, and by space agencies on the uniforms of astronauts as a symbol for the mission.
For us, it's not just about repairing your favourite jacket or adding a touch of style to your bag. It's about embracing your freedom to express yourself and create something unique. These patches represent your individuality and the power of personal style.
It's time to show off your handyman skills and sew on that patch you've been meaning to attach.

Here's What You'll Need:
The garment you want to patch up (this can be a garment that needs fixing or something that just needs a bit of a personal touch)
The patch itself
Thread in a matching colour or a transparent one if you prefer
An embroidery needle
Sewing pins (or a safety pin)
Scissors
Now, let's get down to business.
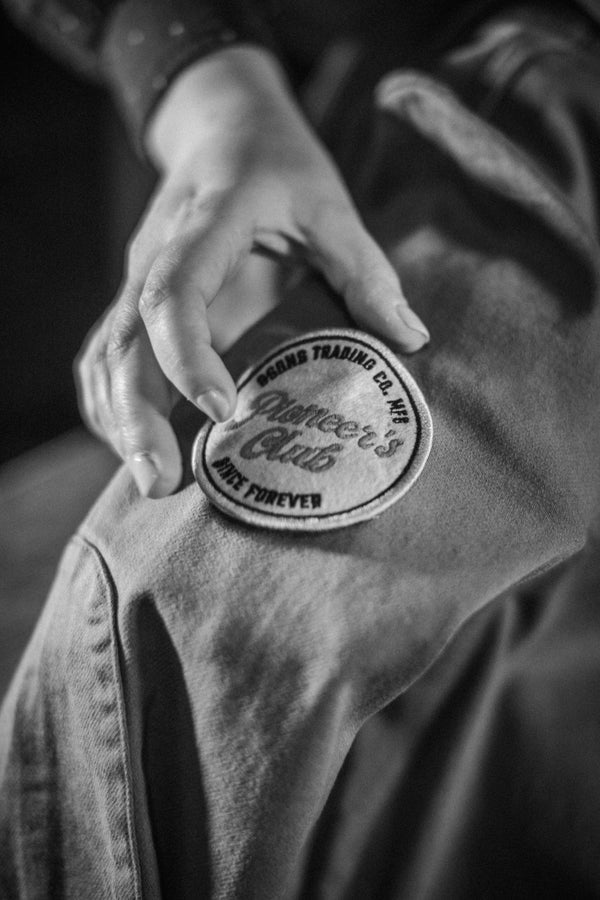
Take the patch and place it exactly where you want it on your garment. If you’re fixing a rip make sure your patch covers it! Once you're happy with the position, secure it in place with either a pin or a safety pin.
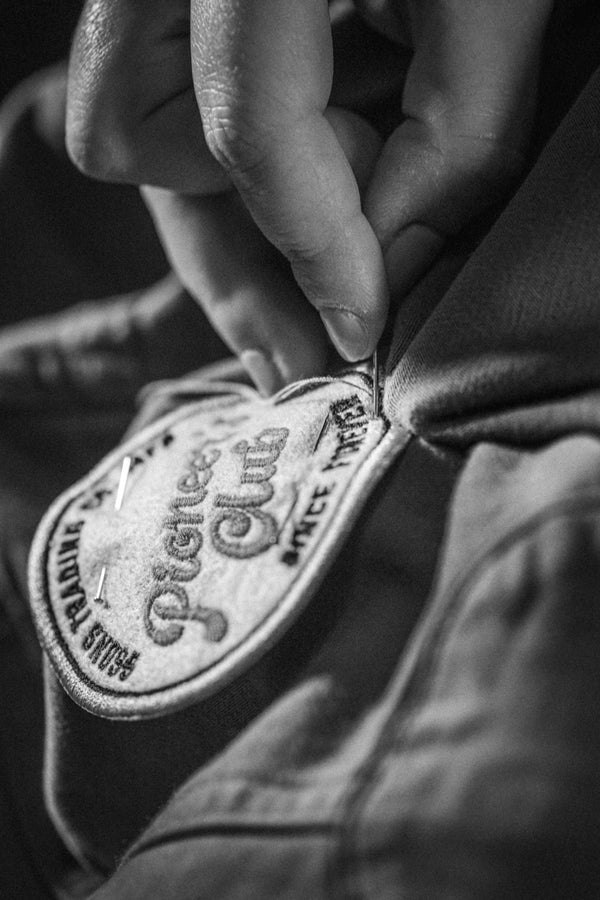
Next, thread your needle with the thread of your choice and create a small knot at the end of the thread, and let's start stitching.
Using a running stitch, sew around the outside edge of the patch. Sew up through the fabric of your garment and through the patch itself. Pull the needle and thread gently until you feel resistance then insert the needle back down through the patch and the garment underneath, repeat the steps and try to keep the stitches small so they’re discreet.
Make sure your stitches are close enough together to ensure the patch stays in place, but not too tight to avoid puckering or bunching of the fabric. Once you've completed stitching around the entire patch, knot the thread and you're done!
You've successfully sewn on your patch and added a personal touch to your clothing. Time to show off your new skills to your friends or family.

Jul 26
Roll The Bones: Pikes Peak

Lifestyle/History Jun 26
Roll The Bones: In the Shadow

Jun 26


